Walnut Picture Frame – Part 5…
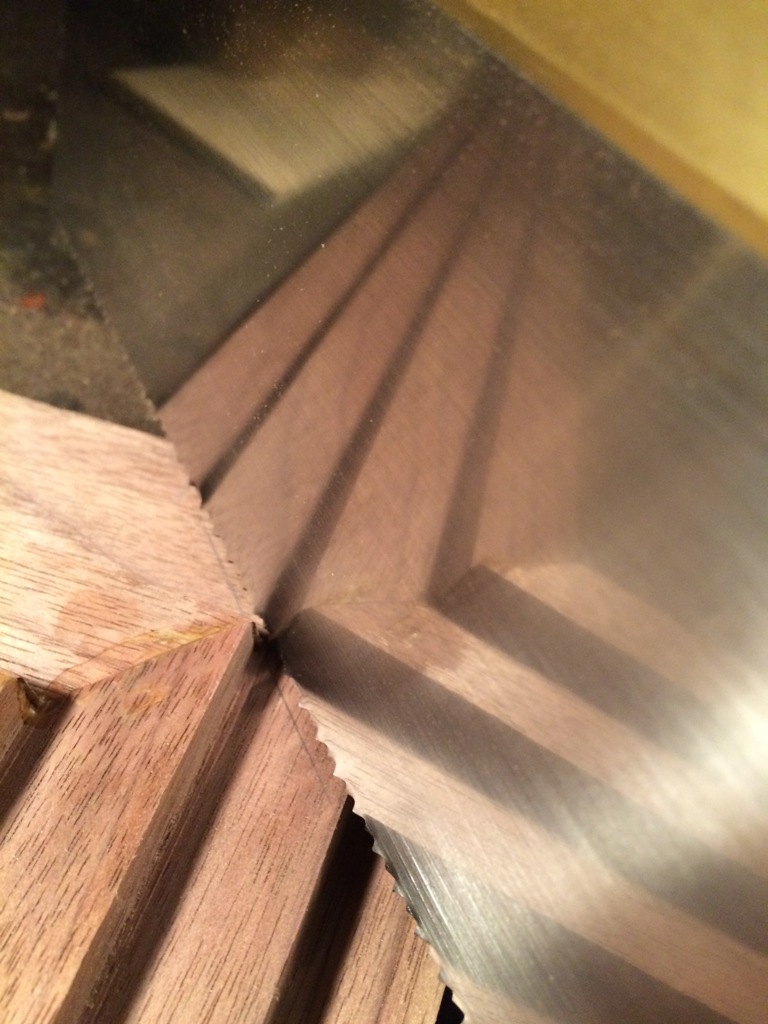
The frame is finally glued up and nearly ready for finishing. I hate gluing miters, and doing something this large is even worse. My workbench isn’t perfectly flat (it’s also still too cold to glue in the shop), so I used an old door to help assemble everything in the basement for gluing. My strap clamp is luckily long enough to fit around the frame, but the edges are relatively narrow, so I had a hard time keeping the corner pieces on. Finally, with a combination of the strap clamps, some bar clamps, and a couple parallel clamps, everything went together. I got some nice squeeze out on each corner corner as well, so I’m happy with that.

Glue Up
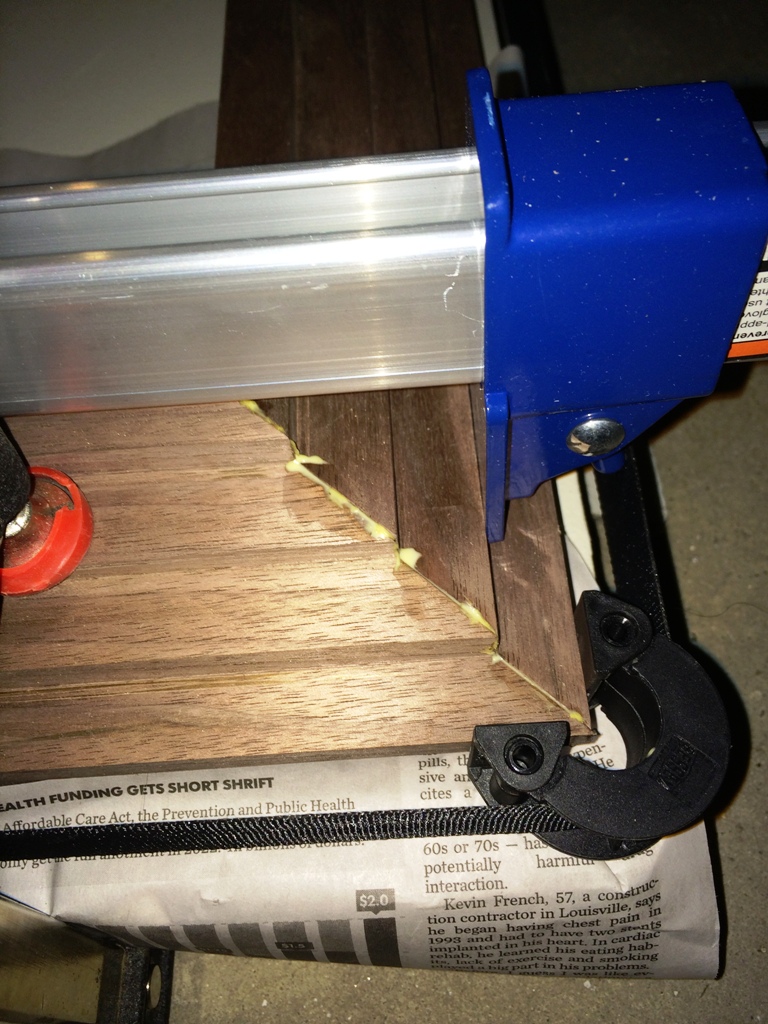
Glue Up
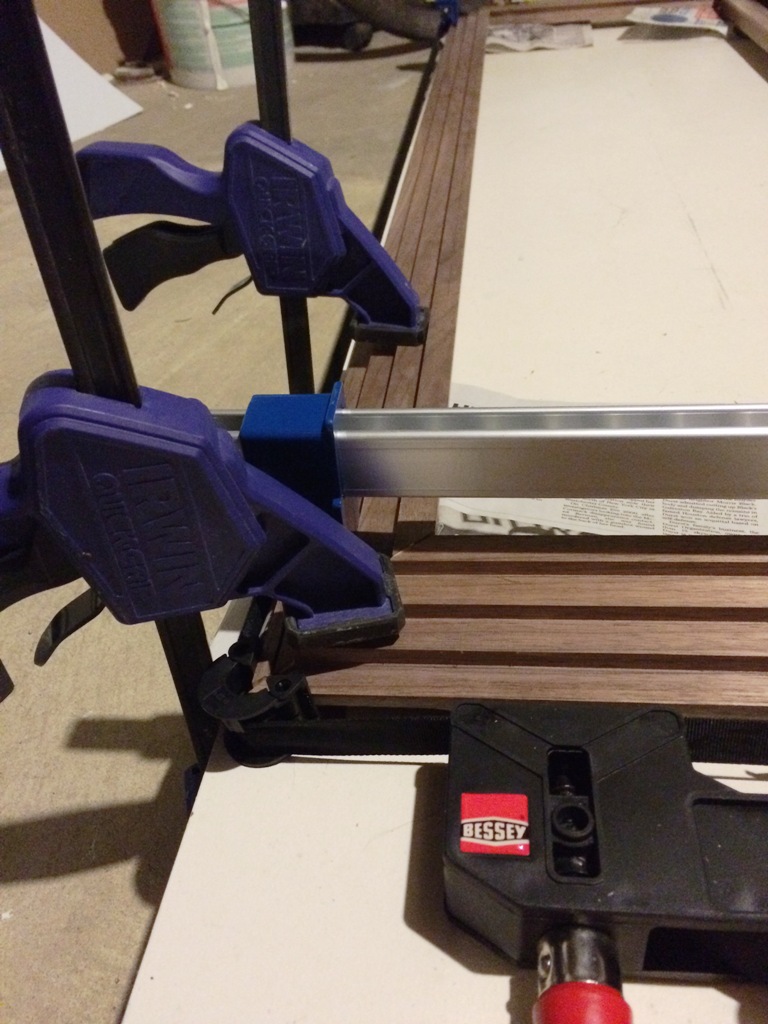
Glue Up
The next day, all the miters are holding up nicely. It really is a massive frame, looks pretty good though.
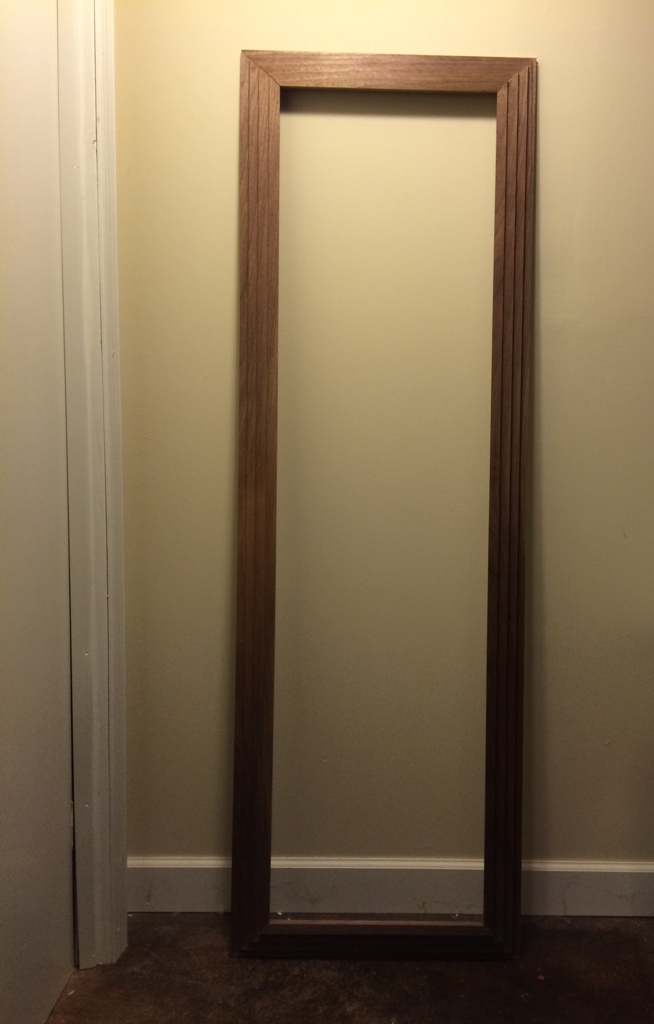
Glued Frame
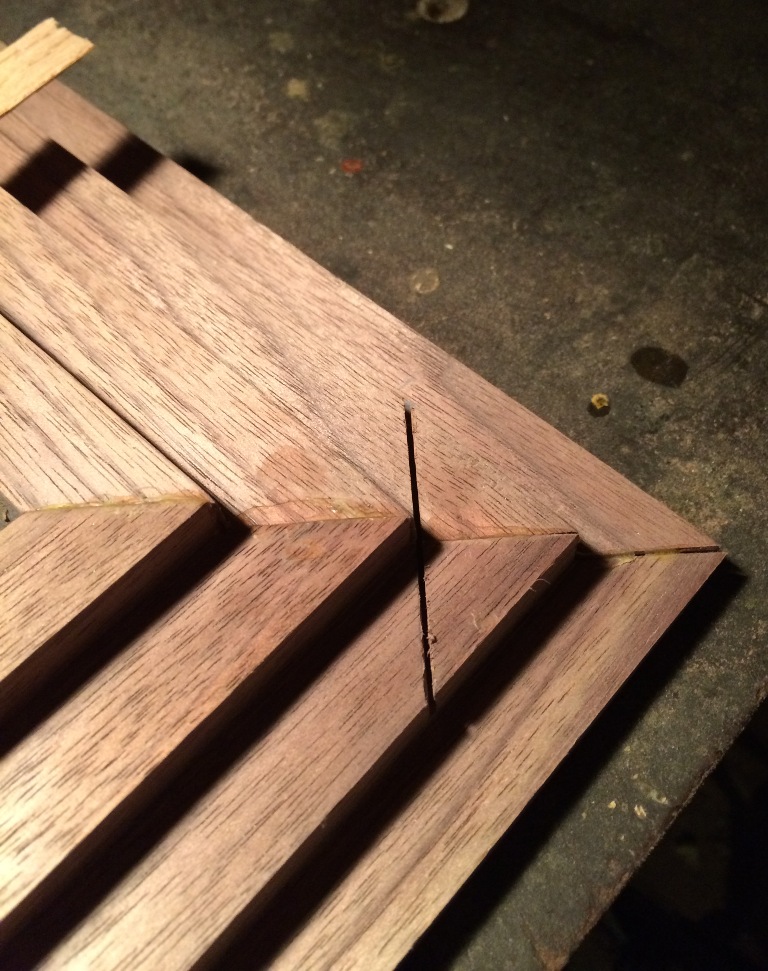
One of the corners has a little gap, so I may have to do something about that.
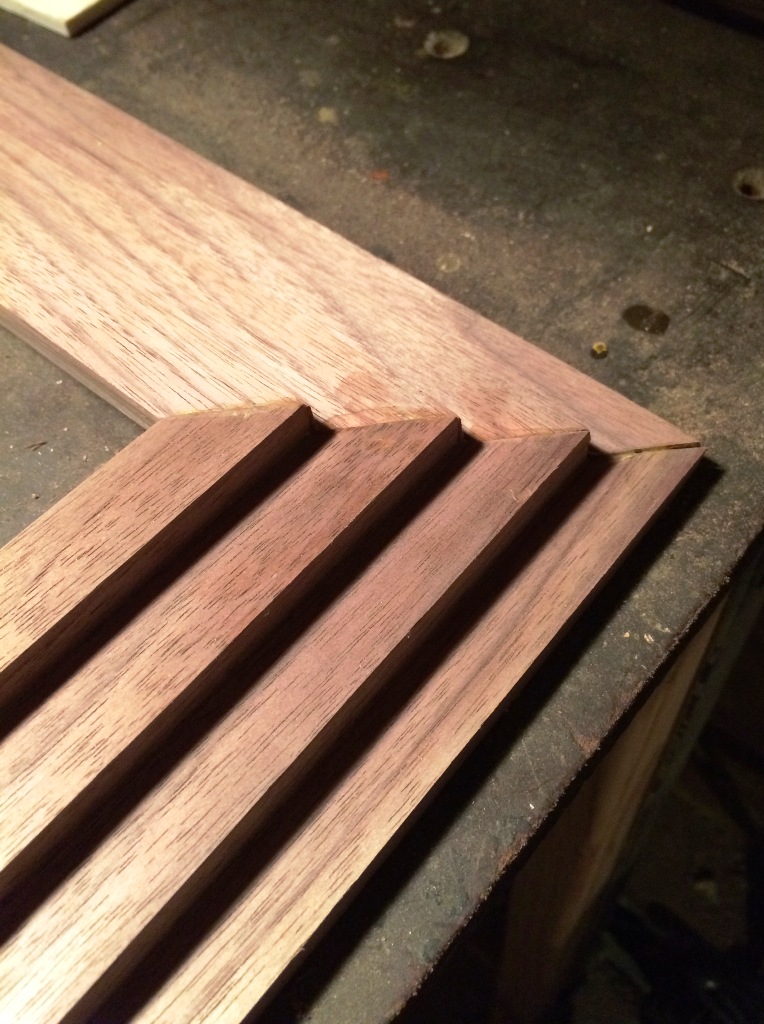
Miter Gap
After trimming everything up it may not be so obvious, so I’ll leave it for now.
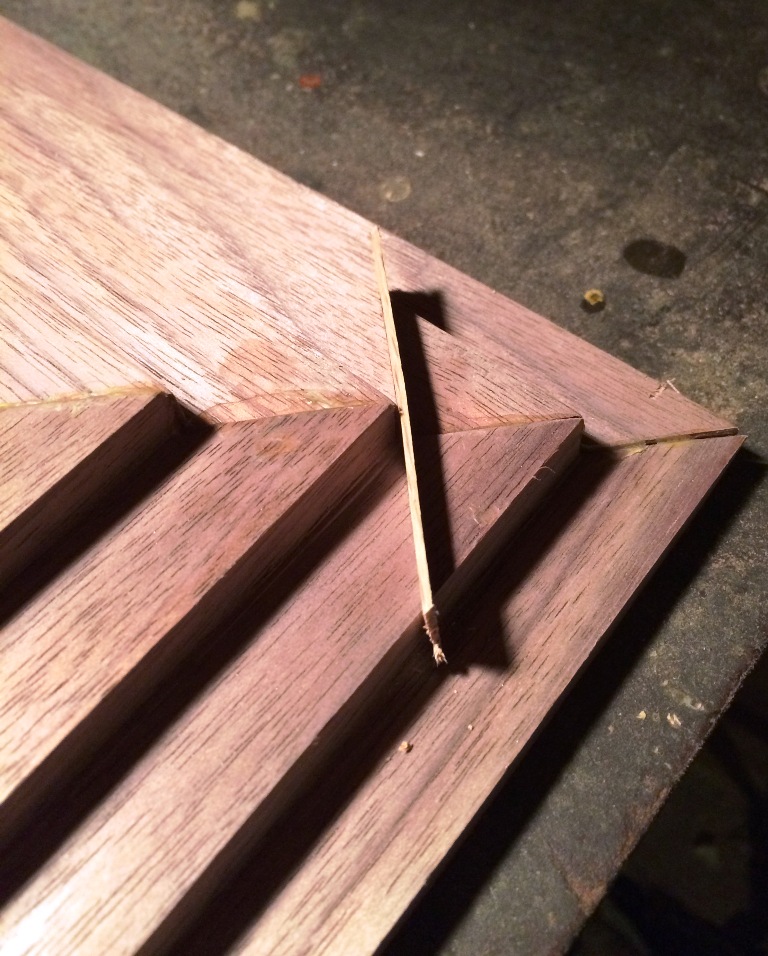
In the meantime, for some extra strength, I added an oak spline on each corner. I used my LN tenon saw to saw a kerf perpendicular to the miter.
Spline Kerf
Spline Kerf
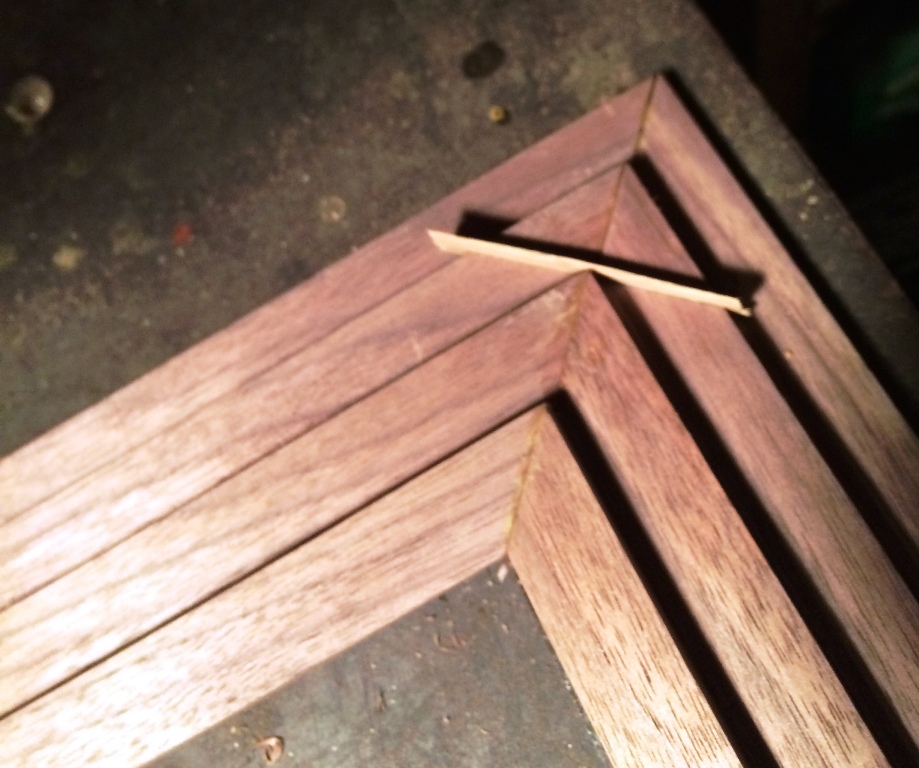
I then cut some thin oak strips out of 3/4″ stock and planed them so they would just slide into the kerf. I used CA glue to attach them.
Spline Glue Up
Spline Glue Up
Tomorrow I’ll trim the excess spline material, then flush up the miters and get rid of the glue squeeze out. I may add another spline to the “step” above the first, but haven’t decided on that yet. I’ll decide on that after I see what it looks like once it’s all trimmed.


Leave a Reply