Packing Box – Part 3…
Not a lot of pictures with this post, sorry about that! This is all just rough dimensioning of the pieces, so a bit boring visually.
With all my pieces rough cut I started in on sizing the end pieces to their final dimensions. The other pieces will be purposely left a little bit oversized, then planed to fit after construction, but the ends will determine the internal width of the box, so need to be correctly sized to start. These actually don’t need to be completely 6-squared, but I need the planing practice, and have the time, so I went ahead and did it.
There are plenty of great tutorials out there on how to 4-square or 6-square a board by hand, these are the steps that I went through:
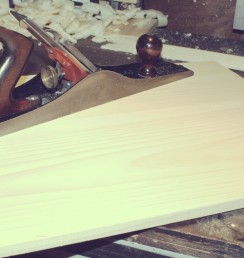
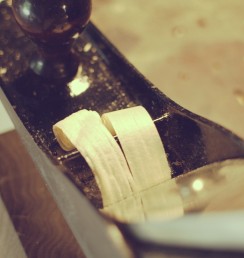
- Pick a reference face and flatten it. I use winding sticks and a straightedge to check for any twist, cups, bows, etc. Once the high spots are identified, I use a jack plane with a cambered iron directly across the grain for heavy stock removal (if I didn’t leave myself a lot of width to work with I’ll plane a slight bevel on the far side of the face to try and avoid spelching). I use an old Stanley Bailey 5C jack plane with a 9″ radius on the iron. When the high spots are mostly knocked down, I use the same jack plane diagonally across the grain from both ways to further get everything on the same plane. When working diagonally, one direction will yield a smoother cut than the other, so I make sure to plane that direction last, leaving a fairly smooth (but rippled from the cambered iron) end result. The last step with the jack plane is taking a few passes with the grain to smooth out some of the ripping left by the diagonal planing. Now I switch to the jointer plane, a Millers Falls No 22 in my case, to get everything perfectly flat.
- Pick a reference edge and flatten it square to the reference face. This is pretty quick work with thin stock like this. I just use a straightedge to check for flatness, then use the jack (if it’s badly out of flat) or go directly to the jointer to flatten. Now using the reference face as a guide, I check for square along the length. I sharpen my jointer plane with a really slight radius to the iron, so by taking a shaving with the plane slightly off center I can adjust the angle of the edge until it’s perfectly square.
- Mark the reference face and edge. I also mark the grain direction on the reference face, as well as whether it is the heart side of the board, or the bark side. This was a tip I picked up in Christopher Schwarz’s “Shaker Side Table” DVD, which helps with arranging the pieces in such a way to account for any cupping or bowing that the board may do in the future.
- Mark the final board width. I set a marking gauge to the desired board’s width and, using my reference edge as my guide, mark out the final width. I’m going to leave this marking gauge set to this width so I can mark the box’s other sides as well.
- Plane the second edge down to the marking gauge lines. I left a fair amount of lee-way here when sawing, so I use the same jack plane to get close to my lines, then finish it up with the jointer. I can be reasonably sure that this edge is flat and square to my reference face, but I check again anyway, just to be sure.
- Mark the final board thickness. I set a second marking gauge to the desired board thickness and, using my reference face as a guide, mark all four edges around. I’m also going to leave this marking gauge set, so I can mark the same thickness on the other pieces. Getting all of the pieces to the same thickness isn’t really necessary for this project because we’re working on getting the correct internal dimensions, but I like to be tidy. I could save some time by setting the gauge to the thinnest part of the board and using that as my thickness.
- Plane down the second face to the gauge lines. I’m taking off quite a bit of stock here because I stated with 3/4″ stock and want it to be about 1/2″ when done, so I start with the jack again across the grain (again planing a slight bevel on the far edge to try and avoid spelching) until I get fairly close, then each diagonal direction, and finally with the grain until I’m nearly on my gauge lines. Then I’ll switch to the jointer to make sure I’m left with a flat face and plane down to my lines.
- Square one of the ends. There are plenty of different ways to do this step. Normally I would use a shooting board, but Thomas doesn’t use one in the text, so I won’t here either. I use a low-angle jack plane to plane one end square with both the reference face and reference edge.
- Mark the final board length. I don’t need to use a gauge for this step because everything else is square, so I just measure from the end I just squared and mark square with my reference edge.
- Either saw or plane down to the line. Depending on how much needs to be taken off I’ll either plane down to my mark or saw, then plane down to the final length. I’ll use a knife wall if I have to saw, just to make sure I’m accurate with the cut.
That’s it for my basic milling and 4 squaring procedure. Thomas doesn’t do much of this in the text, he uses relatively rough stock (it is just a packing crate), but because this is going to go in my house I wanted something a little nicer looking.
I promise that the next post, coming later this week, will have some pictures! It’ll start looking like a box then too.


[…] I’ll be following the same 4 squaring procedure that I did with all the other stock, there isn’t really any difference except that the panel […]
[…] Part 3 […]
[…] Part 3 […]