Pictures, T-shirts, and Photo Manipulation

 am going to be skipping around a lot today, so bear with me! First off, I love my tablet! I have been playing around a little bit more with Inkscape and vector designs as it is a lot easier to do this with the Wacom. I hope to have a nice completed vector design up in a little while. Secondly, my fiancee and I tried our hands at making some t-shirts last weekend. We enjoy doing little projects together and as a Valentine’s Day present I gathered up some supplies and we made our own “vintage” looking t-shirts.
 The process was quite fun actually and is sort of a hand made screening process. Basically what you do is create a design (see the image to the right for my quick “on the plane” sketches) and transfer the design to a light fabric. I went with a skewy bike gear and she ended up going with a winged track foot for our designs. We used an old pair of spandex tights, but pantyhose or a very thin curtain material would work as well. Then you create a template of the design by painting with glue on the areas that you wish to not receive paint. After the glue dries you simply paint on the t-shirt, through the template and you are left with your design. Painting through the fabric gives the resulting t-shirt image a worn out or vintage look. You can also use the template more than once if you want to make shirts for a number of different people. Take a look, I think it came out pretty well! (please excuse the grainy cell phone picture)
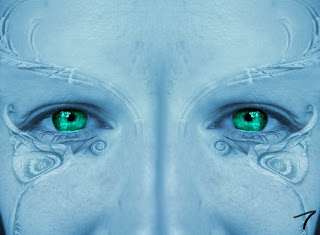
My next bit of jumping around is playing with some photo editing. I wanted to do some really impressive editing, not just cleaning a photo up, so I set out to try my hand at manipulating a face. I took the original picture from this post and used some stock images of tribal graphics, architectural moldings, and clouds to come up with the following:
I really like the way this last one came out. There is plenty more cleaning up that could be done to it, but I think it looks fairly good. I found the iWarp tool in Gimp which really helped to make it look like the graphics were against the face and not floating above it like the previous image.


Leave a Reply