mad scientist…
The new computer is working like a charm and I’m really excited about it! This is the first project that I’ve completed on the new machine and it has been a joy to work with. Small test renders that used to take five minutes to finish are done in no time, so my workflow has really improved!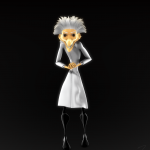
I liked the cartoony style that I had done with my young tarzan model, so I decided to keep along the same lines with my next character. This is Jarvis, my attempt at a cartoony mad scientist! He is based on a quick facial sketch that I had done a couple of months ago which I’ll try to get scanned in soon. He was modelled completely in blender 2.5 alpha 0, but I ran into some bugs when working with texture images, so he was textured, rigged, and rendered in 2.49b. Blender 2.5 was crashing fairly regularly (which is expected with an alpha release) and every time it crashed I would lose the links to my texture images, which got really annoying fairly quickly! I think this is fixed in the 2.5 alpha 2 release, but I just switched back to 2.49 to finsih everything up. I’m much more comfortable in 2.49, but I’m slowly learning the 2.5 interface.
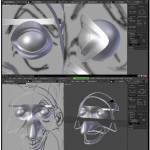 Here are a couple of work in progress snapshots of the modelling of jarvis’ head. You can see that I start out with some major edge loops then gradually fill in the blank areas. You can also see the really rough background sketches as well!
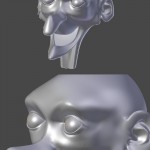 This next image is of the completed head, without teeth obviously. I redid the corner of the eye to add a little skin overlap, which I think fits in better with his older age. Next I added some teeth (which I offset and twisted a little bit in the final image) and gave him a quick simple body.
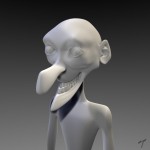
The material and texture are pretty simple and I was studying Pablo Vazquez’s Venom’s Lab DVD during the process of making Jarvis, so the style is similar to some of the things that he does. I hand painted the color map and use a falloff node setup to get the creepy cartoony skin I was looking for. The eyes are the same image texture I used on tarzan with some adjusted colors and contrasts.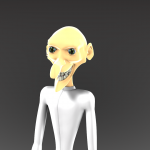
Jarvis has two particle systems, one for his hair and one for his eyebrows. They are similar, but have different lengths and also different materials. I’m actually really happy with the way that the hair and eyebrows came out. Some of the tips that Pablo gives in his DVD were excellent, although I’m certainly not ready to tackle a character like Braka!
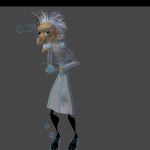 The rig is based on Nathan’s Rinky Rigging tutorial, with a couple of ManCandy tips stuck in there. It is a really basic rig, with just automatic weight painting, but it’s suitable for now. If I decide to do any sort of animation with Jarvis I may add some more features, but that remains to be seen. There are certainly some problems with it, for instance, did you notice that his teeth aren’t really lined up with his jaw? Not quite sure what was happening there! For the lab coat I started out thinking that I was going to add a cloth setup, but that got a little involved, so I ended up just adding some bones to control the tails. After I pose the body I’ll go back in and move the tails around so as not to intersect the legs. There actually is a little bit of intersection in the render above, oops! I think what you can do is add the rig, then run the cloth simulation after you have posed the cloth to avoid intersections. If the body is setup as a collision object the coat should fall nicely around the legs. The key word there is should, it never seemed to be that simple for me!
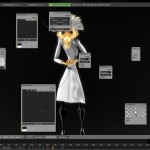 Finally, this is the first time that I’ve tackled compositing nodes and let me tell you, I didn’t realize what I was missing! This is an incredibly powerful way to spice up an otherwise dull looking render. This is a screen shot of the node setup I’m using. It’s really simple, but a few months ago my eyes would have glazed over looking at it. All I’ve done is adjusted the RGB curve to avoid some of the washed out sections (see the wip picture above) and to give it a more dramatic effect, then added a blur node. The blur node lets you add a nice glow effect to the character. I will also thank Pablo for describing nodes in a way that I can understand!
Overall I’m really pleased with how Jarvis came out and also with the bits that I’ve learned during the process. I’m not too sure what I’m going to do with him yet, but I may end up making a full scene for him. I was thinking about doing a frankenstein type setup with the stereotypical castle top laboratory. I may even make a monster for him to work on!

Leave a Reply