rolling ball sculpture…
I watched the movie Fracture a couple of weeks ago and I was totally amazed by the apparatuses that Anthony Hopkins creates in the movie. He plays this genius engineer who in his spare time makes these intricate machines that roll marbles around on different shaped tracks. I had seen these in different places, mainly touristy type places where you insert a quarter in and watch the marble roll around, but never as an actual piece of artwork like in the movie. After a little bit of research I came to find out that the correct terminology for these things is Rolling Ball Sculptures, or Kinetic Art (more of a general title that describes any sort of art with moving parts). Being someone who likes to think he’s good with his hands and who is a bit of a physics geek I thought to myself (and out loud to my wife) “I could make one of those!” Thus began the building process of my first rolling ball sculpture.
The obvious first step in an endeavor such as this is online research. It turns out that there is a community (I don’t want to say big community) of people who build these pieces for a living or for a hobby, so there are some resources/examples out there. After a bit of research, read as watching cool RBS (rolling ball sculpture) videos, I had some basic ideas as to how to go about making a very basic RBS. I decided that for my first sculpture I wanted to make a very basic, simple loop the loop, much like the first loop on most roller coasters after the first downhill. A long plane trip to Seattle and I’d figured out the exact dimensions and physics behind a loop the loop (I was a bit rusty with mechanics!). For those of you not wanting to go through all the physics, disregarding friction, the height above the top of the loop that you will need to start the rolling ball at is 0.7 (R – r), where R is the radius of the loop and r is the radius of the marble.
The next step was gathering together the necessary materials for the building process. The sculptures in the movie were made out of nice shiny brass, which to me equaled too expensive, so I searched for some different materials. The ideal material to build these pieces out of is stainless steel because it’s so strong and will not rust, however to put everything together you need to weld it! I’m not up to the point of needing to get a welder, so the search continued. Finally I came across an RBS video with a piece made out of copper track, perfect! Copper is an excellent option for a novice rolling ball sculptor as it’s very easy to bend and can be soldered together without the need of a welder. Having done some recent home plumbing work I happened to have all the torches and solder I would need. I also happened to have done some electrical work in the house recently, so I had a bunch of Romex wire around, which, when stripped of the outer coatings, makes for perfect copper track! That being done I picked up some marbles at the local toy store and was on my way.
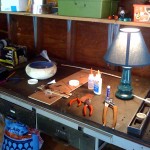 Having gathered together all the necessary materials I immediately set to work on making some test track. I estimated the width of the two track pieces at 0.4 inches for my 1″ marble (keep this in mind!). I made a nice little jig to hold the pieces of track together while I soldered the spacers on (the pieces that hold the track at a fixed distance apart from each other) and then straightened out a small piece of wire. It was certainly good to do this little test piece because I ran into some problems initially.
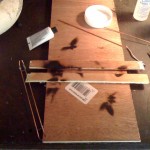 First off I made the jig with one piece of wood on each side of the 0.4″ gap. This made it nearly impossible to access the joint where the spacer connects to the track in order to solder it, doh! I ended up burning the wood up fairly quickly and not heating the joint evenly. The second thing was that it was really hard to hold the spacer up against the track pieces, hold the torch, and hold the solder all at the same time. Lastly, my track pieces kept trying to move around and wouldn’t stay put at 0.4″.
All those issues aside I did manage to get a piece of test track soldered together!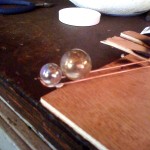 However, it ended up fitting the small half inch marbles better than the one inch marble?!? Turns out that I had forgotten to take in to account the thickness of the wire itself when measuring out my 0.4″ gap, oops. Besides that little setback, I was quite happy with the result. The marbles rolled nicely on the rails (after a little cleaning up of my messy solder joints) and I had something to play with finally!
After my learning experiences from the previous day I set out to improve my technique on Sunday. I remade my jig to account for the thickness of the wire and also placed a piece of wood in between the two pieces of track to hold them apart. I also cut an empty space in the jig so that I could access all sides of the joint. These little changes to the jig made it much easier to solder. I still have the problem of trying to hold too many things at once when soldering, but I plan to pick up one of those “Helping Hands” tools today to hopefully remedy that.
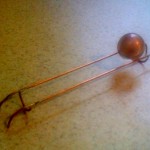 To the left you can see my finished test track! The joints aren’t exactly the prettiest things in the world, but they are certainly strong enough to hold the spacers on to the track. With a little sandpaper clean up work the marble wouldn’t even realize it’s rolling over something. The new spacing of the track pieces is also much better than previously. This should keep the marble on the track around corners better.
I’ve started to work on the actual track now and have the ramp leading up to the loop all soldered together. I’ll be working on loop part this week and will hopefully have some updates in a few days. In the mean time I hope that you have enjoyed the deviation from all things blender!

Leave a Reply