rolling ball sculpture…
It’s been a little while since I’ve posted anything of interest and I have to apologize about that. The Blake’s character series is on hold for a little while. He is completely modeled now and we’ve used a few interesting techniques to create his clothes. The next step is to start to add some materials to him, then rig him for animation. I will get there eventually, so please be patient!
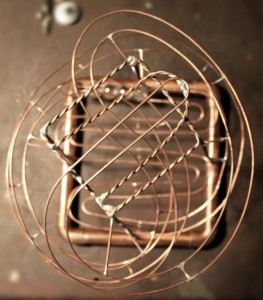 A few months ago I wrote a few posts about making my first rolling ball sculpture. Well, I took some things that I learned in the first one and went on to make another one. The one main thing that I took away from my first attempt was that it is really important to make the base of the sculpture strong. The last one I had to sort of hold while the ball was rolling so it wouldn’t fall over! With this one I used some copper pipe for the base and it makes a huge difference. It feels very secure and is extremely easy to move around.
The track is 14 gauge copper electrical wire, stripped of the plastic sheathing. The supports are two wires twisted tightly together. Fourteen gauge is a little light for the sculpture, but I’m using the small, regular sized marbles, so it works out OK. Ideally I would probably want to use 8 or 10 gauge wire so I wouldn’t have to add so many supports in. Another lesson learned!
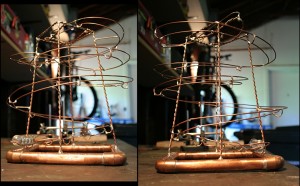 I’m pretty happy with the way it turned out. It nicely sits on a desktop and the end of the track is large enough to hold about 5 marbles, so you can release a few at a time from the top to chase each other down. I must have spent a good 10 minutes just rolling marbles down it when it was finished. It’s just such a soothing thing to do. The sound is great and watching the marbles go down is really relaxing.
Eventually this copper wire will corrode/rust, but that’s OK with me. This was originally just a learning experience. I think I used the wrong type of flux and solder. I probably should have used silver solder and tinning flux, but again, lesson learned!
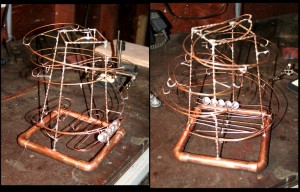 I’ve already started to gather some supplies for the next one. The next one is still going to a desktop one, but probably a bit bigger than this one. I also want to do a few new things with it. I’d like to make it completely out of brass, which should like really sharp! For the track spacers I also want to use brass washers, instead of little pieces of track along the bottom. This should give the illusion of going through a bunch of little tunnels, which should be pretty cool. I’m still debating about this next one, but I think I want two tracks, which would involve a splitter. Finally, I’d like to give a shot at making it motorized! Big ambitions for the next one, so we’ll see how it comes out!

Leave a Reply