On Sharpening Saws – Part 1…
It’s important for a craftsman to be able to maintain his or her own tools. This not only allows for faster, more efficient work, it’s also safer and gives the craftsman a better understanding of the tools. For woodworkers, this means a lot of sharpening. Sharp tools produce better results, in less time, and are safer to use. Being able to sharpen one’s own tools was a necessary skill for traditional woodworkers to have because it wasn’t practical to send tools out to be sharpened. When a tool was found to be dull the journeyman, or apprentice, would pause for a few minutes to sharpen the tool, then immediately get back to work. For modern hobbyist woodworkers, being able to sharpen your own tools I think also brings about a lot of self-confidence and pride in the craft.
I have a nice routine down for sharpening chisels and plane irons, but I’ve never sharpened a hand saw before. In our modern, throw-away society, mass produced hand saws are meant to be used until dull, then discarded for a new one. I have some saws that need to be sharpened (which was painfully obvious when I broke down the stock for the Packing Box project!) and I try not to be a member of this throw-away society, so thought it was time to learn how to sharpen a saw.
A quick disclaimer before I start, this post isn’t meant to be a guide on how to sharpen a hand saw. I’m teaching myself how to do this, so am a complete novice. Actually, it would be nice if this generated some criticism of my technique so I can learn better.
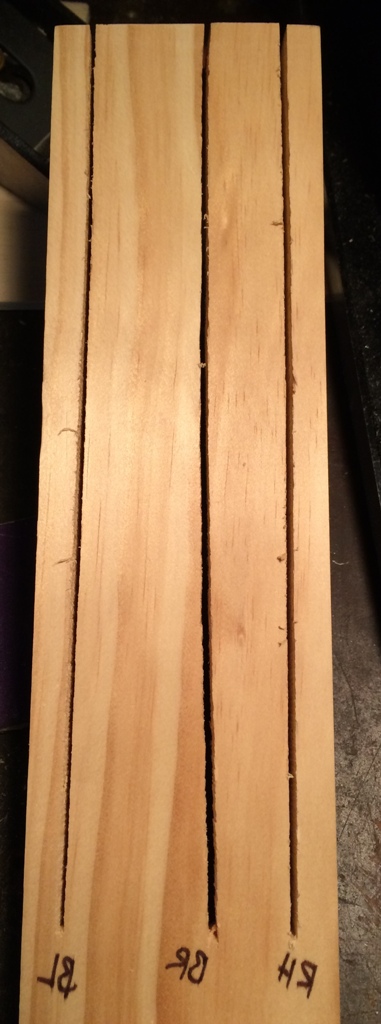
For this post I’ll be sharpening up three vintage saws. Coming from an engineering background, I like data, so I’m hoping to track my progress with these saws. My goal is to do some test cuts with all three saws, sharpen them up, then do a few more test cuts to see how I did. I’d like to sharpen two of them rip (with slightly different geometries), and one of them cross cut.
THE LINE-UP
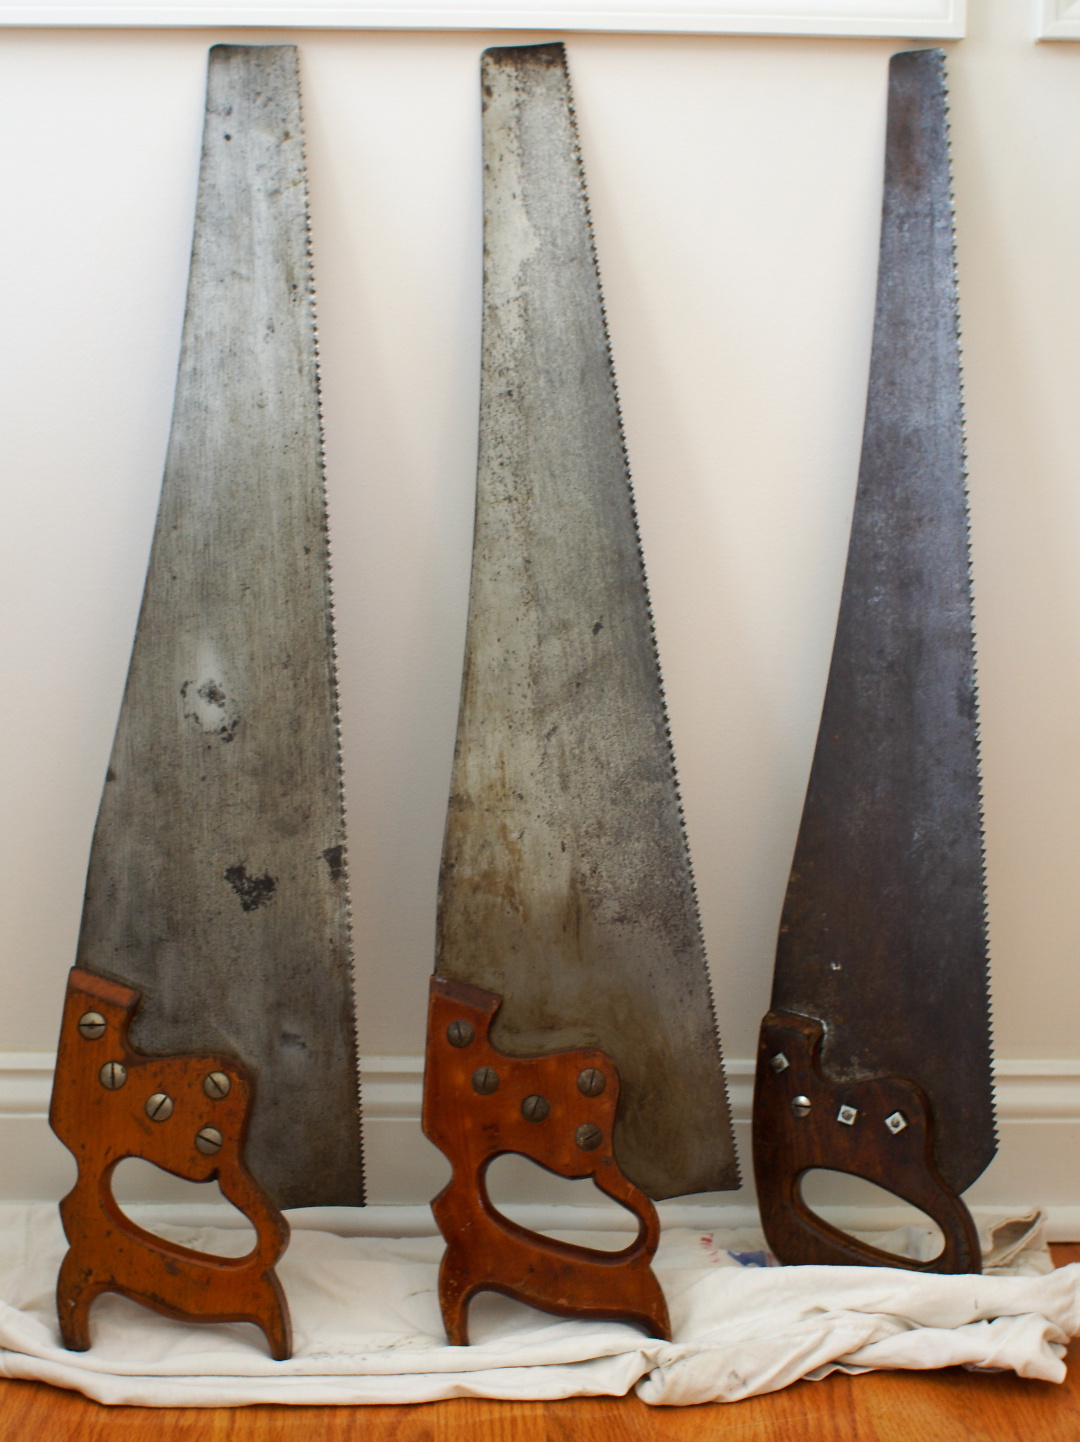
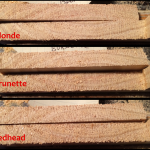
Three Vintage Saws
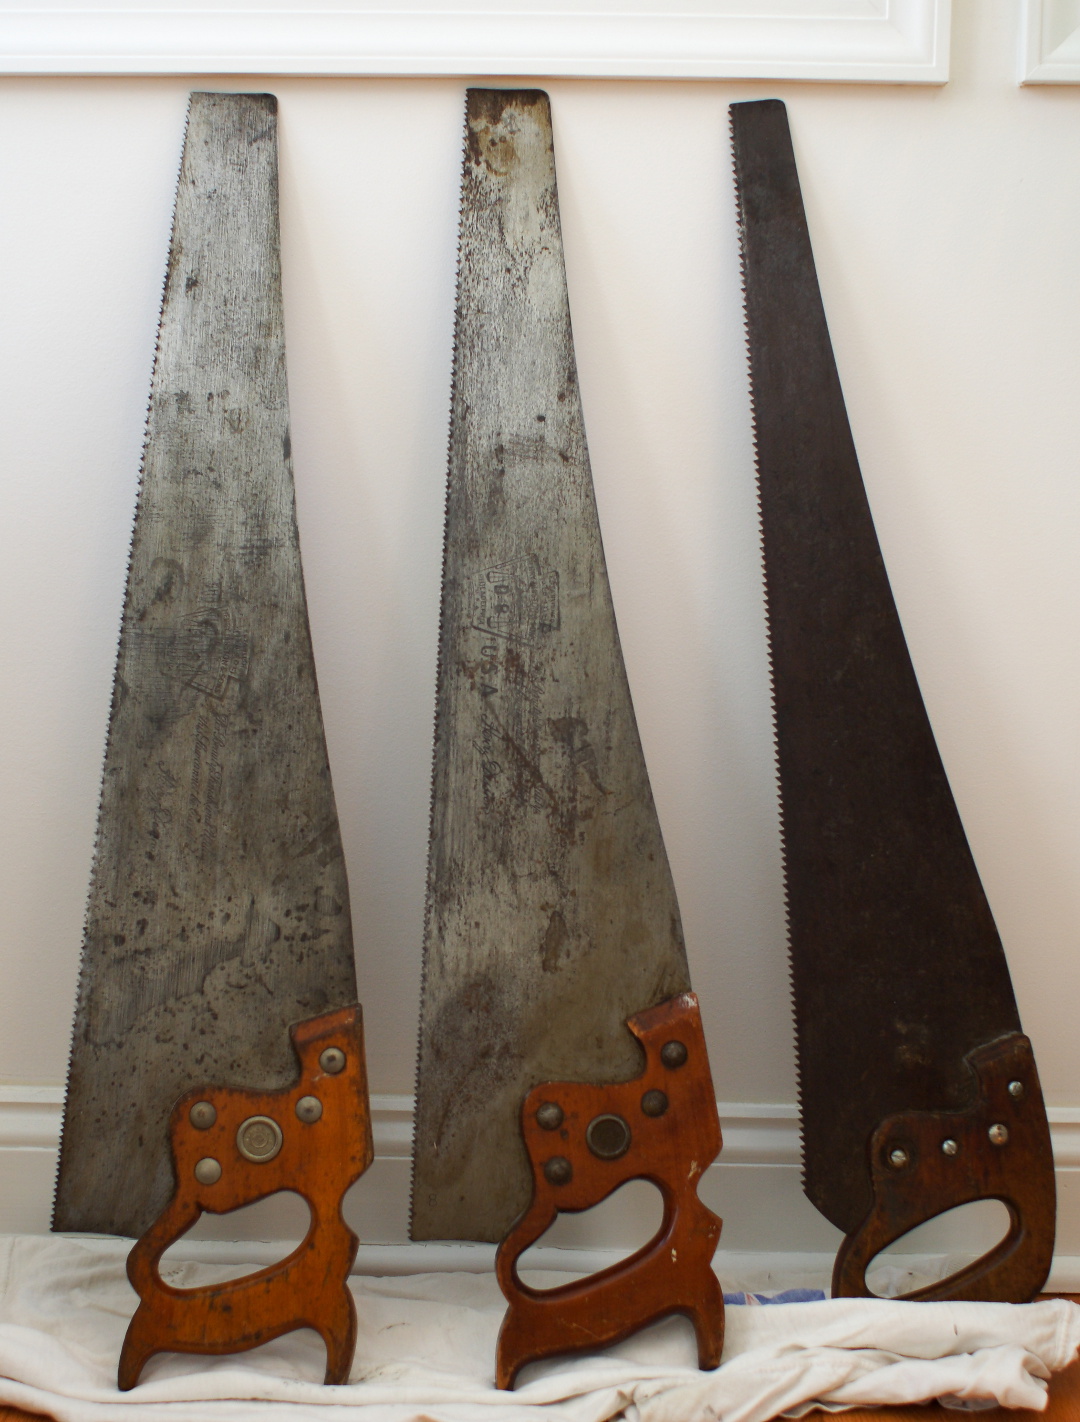
Three Vintage Saws
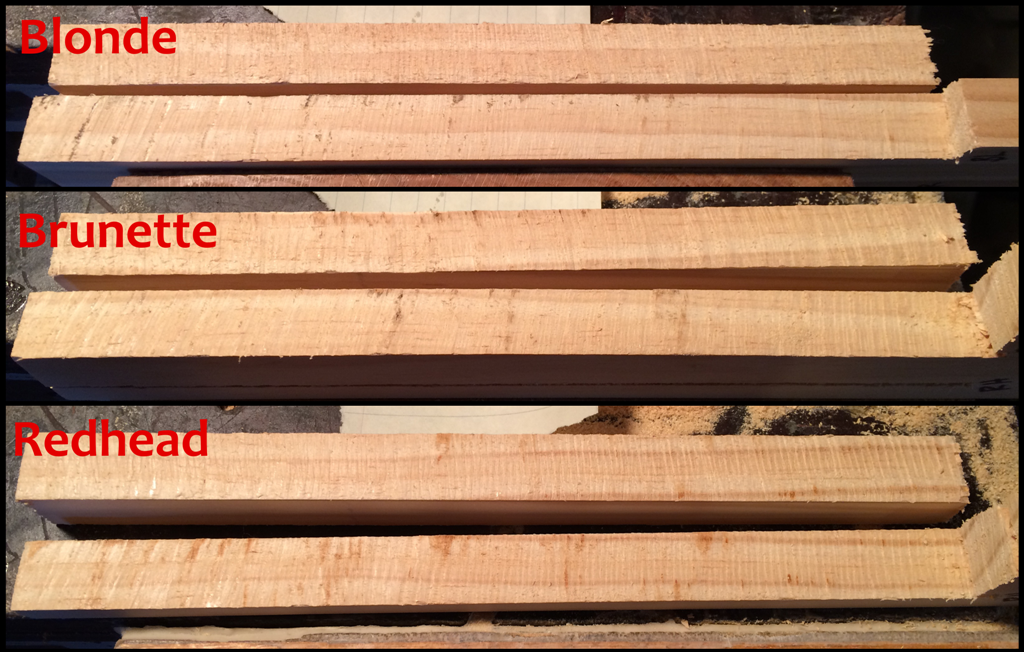
I’m lucky enough to have a few vintage hand saws passed down to me. From left to right in the two pictures above we have two Disston D8 26″ hand saws and an unknown 26″ hand saw with a replaced handle and fairly heavily skewed back. All three are filed rip (I believe, but hard to tell what they were originally!). The two Disstons are both 8tpi and the unknown is 6tpi.
Three Vintage Saws
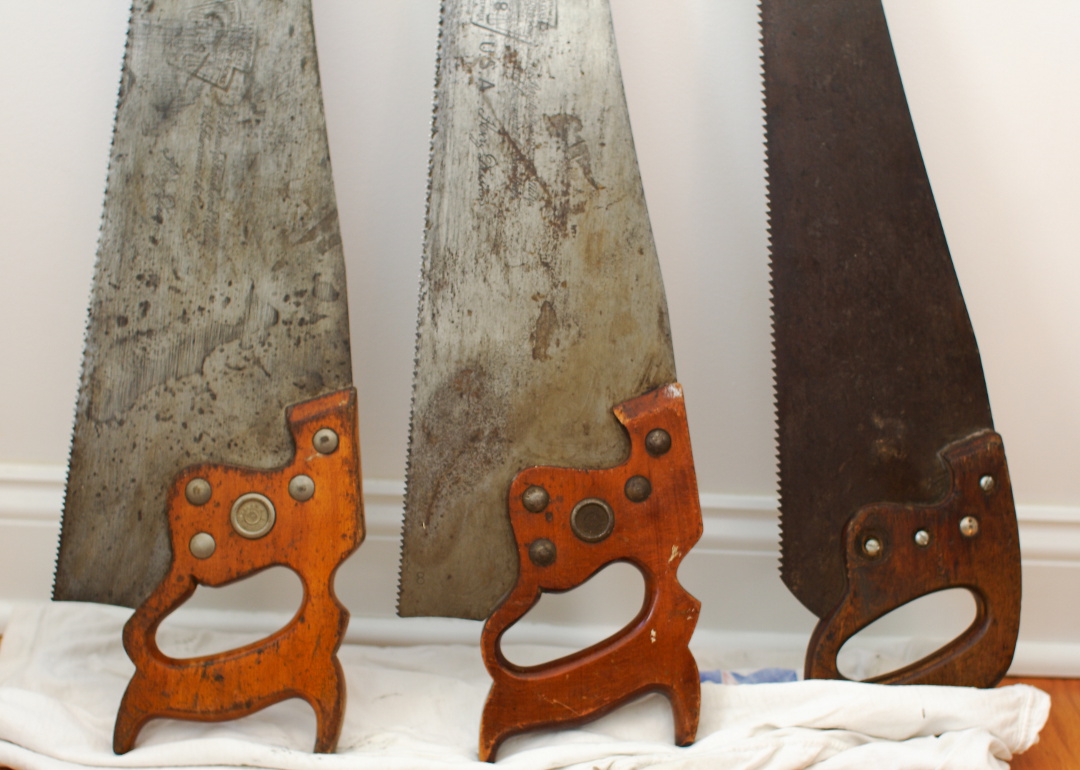
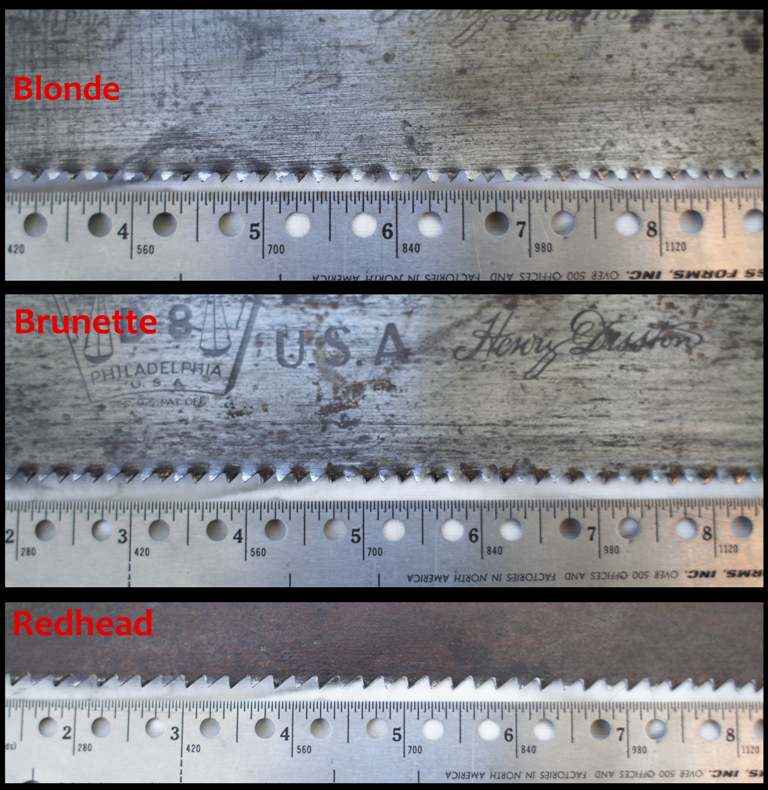
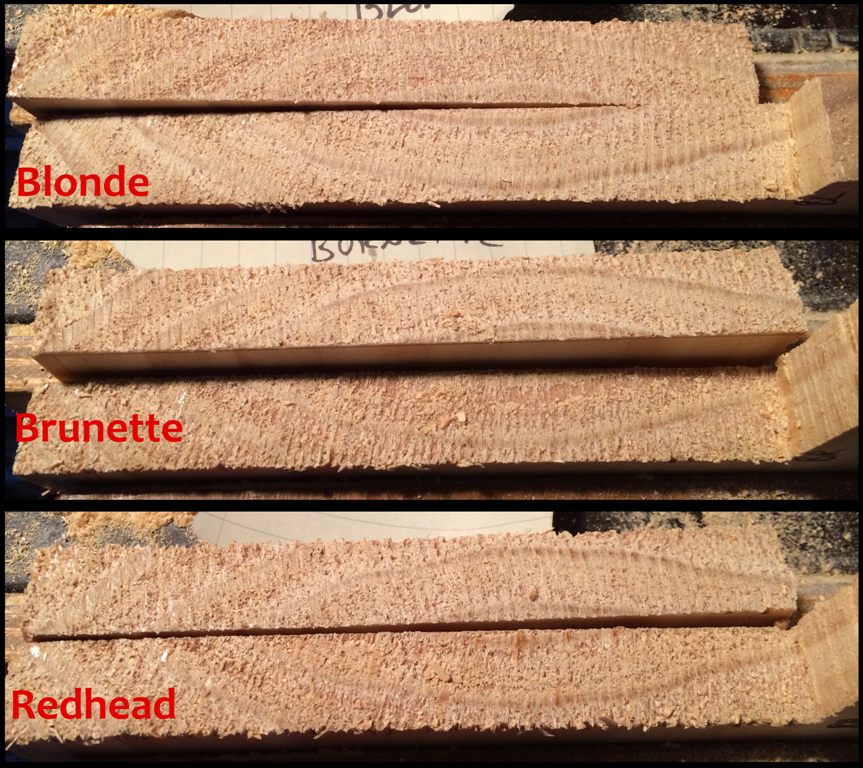
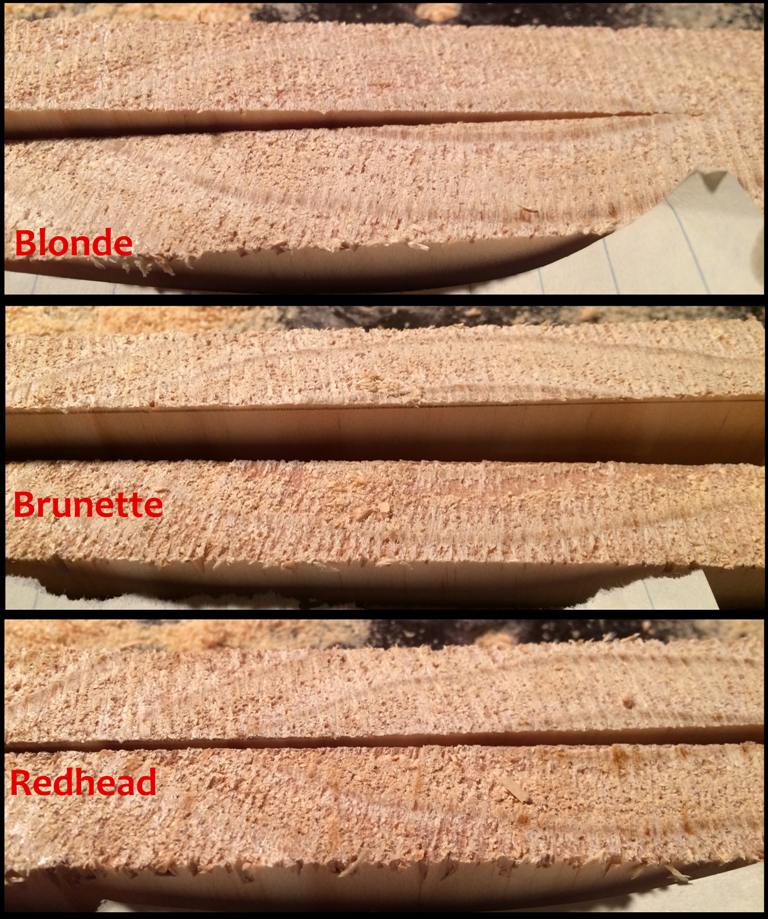
For ease of reference as I go along I’m going to keep the saws in order in all the pictures from left to right and top to bottom. I’ll also refer to them as Blonde, Brunette, and Redhead (in that same left to right, top to bottom order), based on the different color handles.
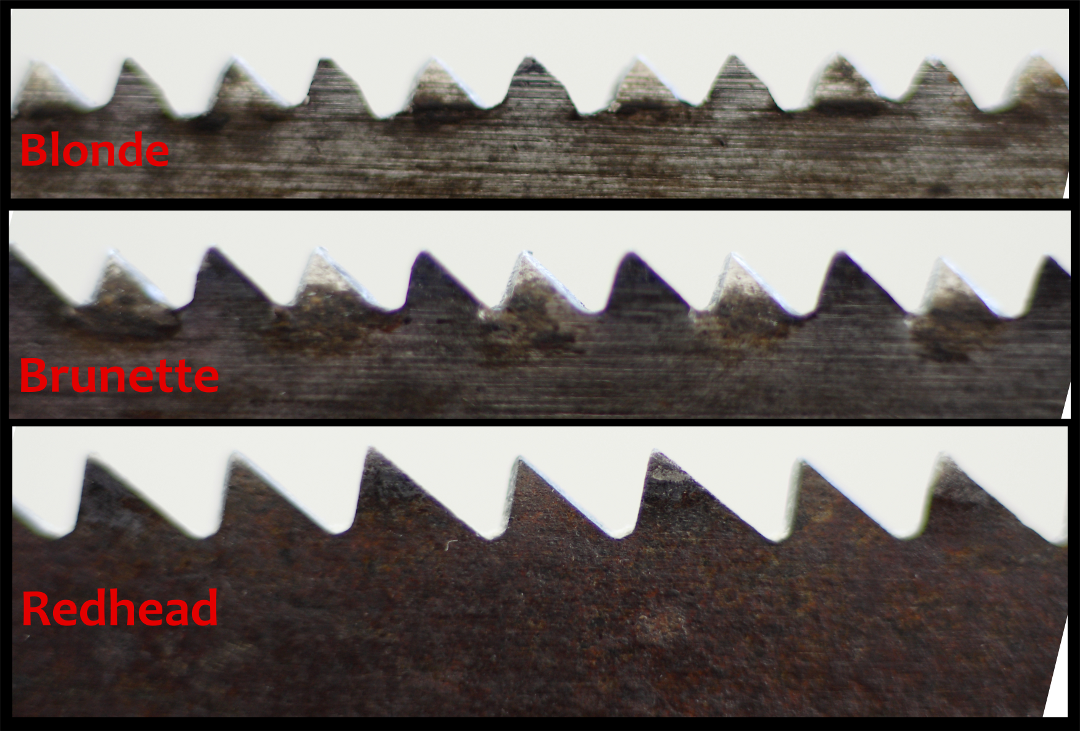
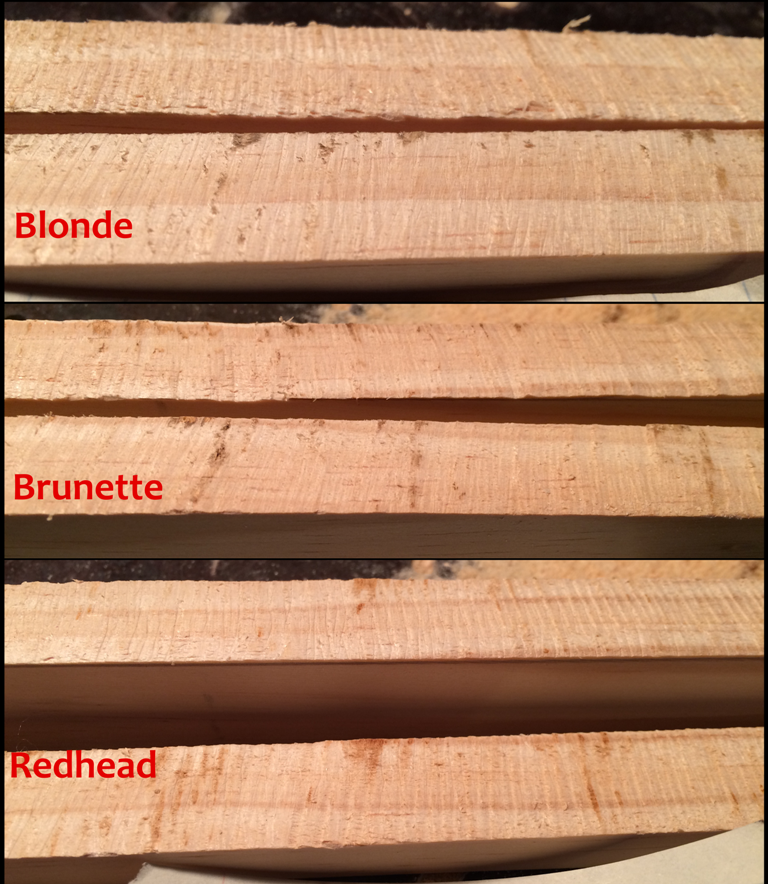
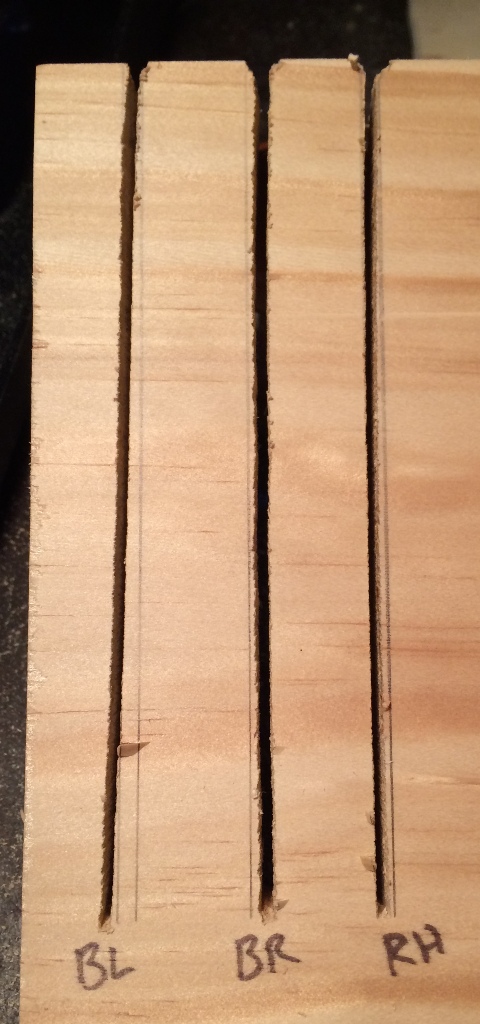
And a few pictures of the teeth (click to zoom):
-
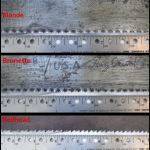
- Baseline Saw Teeth Profile
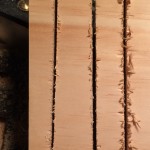
-
- Baseline Saw Teeth Profile
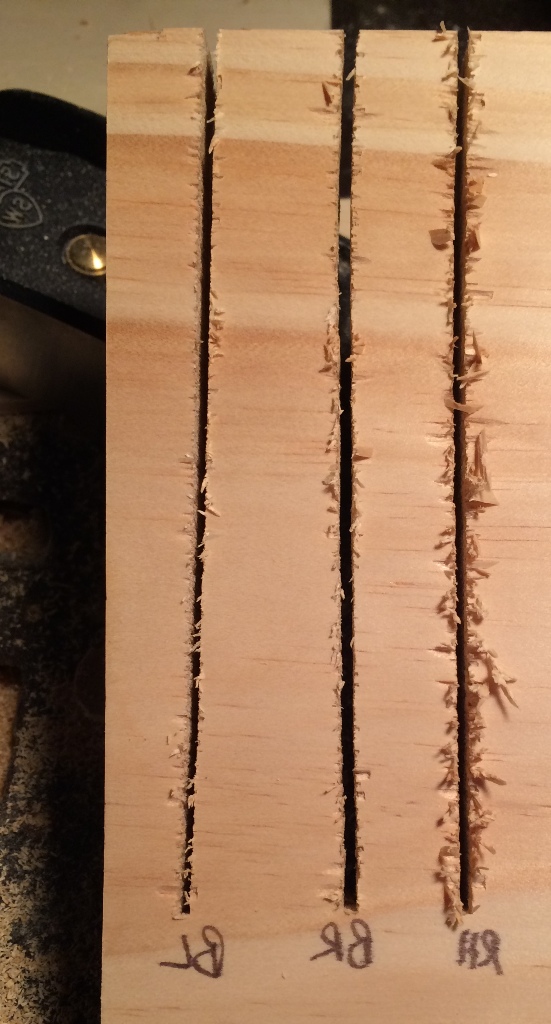
-
- Baseline Saw Teeth
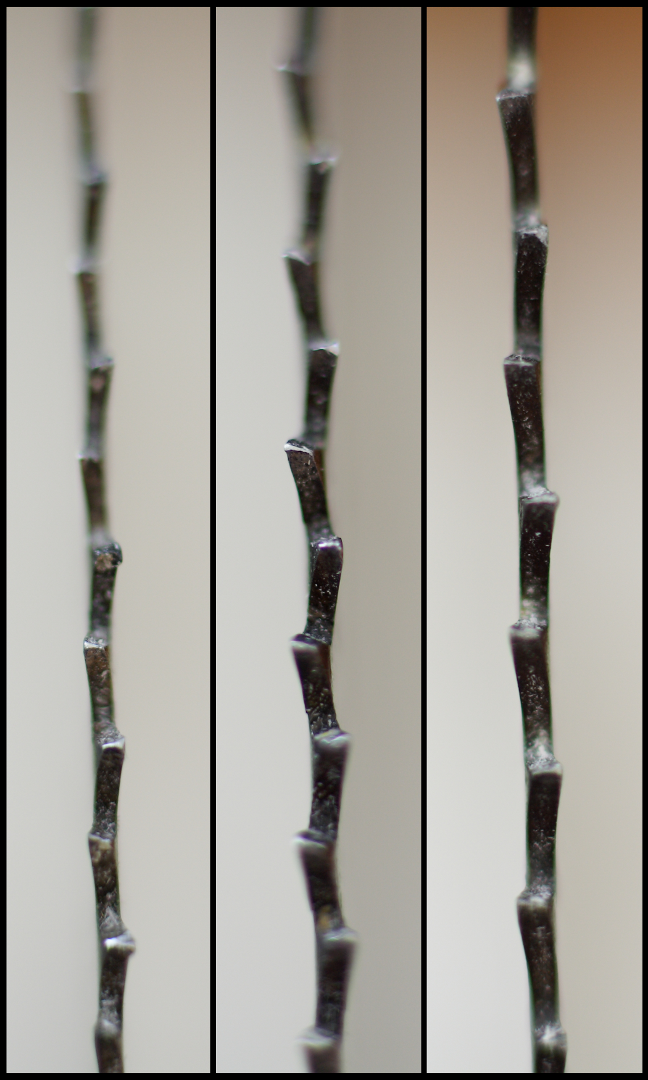
Attempting to measure the rake angles that these saws are filed to is tricky, but looks like the Blonde is about 27 degrees, Brunette is about 14 degrees, and the Redhead comes in at about 7 degrees. The Brunette looks like it has the most set, far more than the Blonde, and a bit more than the less tpi Redhead even.
WHEN TO SHARPEN
Maybe it’s because I’ve never really paid much attention to sharpening saws in the past, but knowing when to sharpen a saw I think is tricky. With a chisel or plane iron you can always use the thumbnail trick, or try cutting paper, but a saw is a bit different as there isn’t just one edge, but lots of edges.
Obviously checking to make sure the teeth are intact is a good place to start. If the teeth are all different sizes, flat at the top, or broken, odds are good that you’re restoring an old saw and already knew it had to be sharpened. With an everyday user saw that’s in reasonably good shape, it’s not so easy to tell. Next step, the saw should “feel” sharp. This is obviously subjective, but if you lightly run your hand against the teeth they should catch your skin. None of these saws really did that for me, and I could actually grasp these saws quite hard across the blade (with no blood I might add!).
I’m imagining that eventually I’ll be able to tell just be lightly feeling a saw whether it needs to be sharpened or not, but I’m not quite there yet. So, the last test is of course how well the saw cuts. Does it take forever to cut, not cut straight, or bind in the kerf? These things are probably hard to tell if you’re used to cutting with a dull saw (as I was). I figured sawing was supposed to be hard work! My mind immediately changed when I used a new Lie-Nielsen saw. Using that was a joy! It cut easy, straight, and fast. If you can, I would try to compare your saw to a known sharp saw, otherwise there is no reference for you.
THE BASELINE
Like I said, I like data, so I wanted to see the change from dull to sharp with these saws. I made both rip and crosscuts with all the saws while collecting some information from them. I’m not the best sawyer, so some of the problems that I point out will most likely be with my sawing technique, but I figure that’s a constant for all of the saws. My sawing deficiencies should effect them all equally, so the result should be the same.
I “graded” each cut on a few different criteria:
- Perceived Effort – scale of 1 (easy, low effort) to 6 (hard, high effort)
- Number of Strokes
- Time
- Line Tracking – scale of 1 (perfect line, easy tracking) to 6 (can’t cut straight)
- Cut Quality – scale of 1 (perfect cut) to 6 (horrible cut)
For the first cut I ripped a 10″ long kerf in some pine, then took a look at the results (the “back” picture is flipped horizontally to maintain the same left to right order elsewhere):
-
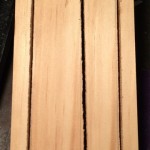
- Rip Cut Test Front
-
- Rip Cut Test Back
-

- Rip Cut Test Cuts
-

- Rip Cut Test Cuts
BLONDE:
- Effort: 5 – I was really working at this one, both to keep the saw straight and to actually cut.
- # of Strokes: 198
- Time: 3:48
- Tracking: 3 – It did alright in the end, but I was really working to keep it on the line.
- Quality: 4 – It’s ok, but I’m hoping for better
BRUNETTE:
- Effort: 6 – This was hard! It felt like it took me a long time, it was hard to start, and very squeaky.
- # of Strokes: 249
- Time: 4:47
- Tracking: 4 – Started out OK, but just got worse as I went along.
- Quality: 4 – Very similar to the Blonde, but maybe a little bit less tear-out on the back
REDHEAD:
- Effort: 4 – Easier than the other two, could have something to do with the tpi, a bit squeaky as well.
- # of Strokes: 150
- Time: 3:12
- Tracking: 3 – It wanted to wander, but was easier to correct, maybe because of the skewback.
- Quality: 4 – Even with the lower tpi, the cut looks similar to the other ones, with maybe a tad more tear-out.
The second test cut was a 6″ cross cut in the same piece of pine:
-
- Crosscut Test Front
-
- Crosscut Test Back
-
- Crosscut Test Cuts
-
- Crosscut Test Cuts
BLONDE:
- Effort: 3 – Tough to start, but not too bad after that.
- # of Strokes: 91
- Time: 1:53
- Tracking: 6 – Not good at all.
- Quality: 3 – The tear-out wasn’t too bad and the cut actually looks OK.
BRUNETTE:
- Effort: 2 – Very squeaky, but bit into the wood nicely once it got started.
- # of Strokes: 88
- Time: 1:44
- Tracking: 3 – OK actually, better than the ripping with this saw.
- Quality: 4 – The cut looks similar to the Blonde, but tear-out was worse
REDHEAD:
- Effort: 2 – Nice and quick.
- # of Strokes: 60
- Time: 1:12
- Tracking: 2 – Was easy to correct.
- Quality: 5 – Horrible tear-out, but the cut looks OK, especially for the lower tpi.
There we have all the baseline data. If pushed to pick a “winner” I’d go with the Redhead for rip cuts and probably the Brunette for cross-cuts, although I wasn’t terribly impressed by any of them. Interestingly enough, I’ve been using these saws for a while now, but never really focused on any of these things. I would just grab whatever saw was nearby and use it.
Up next will be the sharpening process and then the final cuts.


[…] See Part 1 here with all the baseline data. […]