Stackable Sawbenches – Design…
One thing I don’t need at the moment is another project. I have some business trips coming up, the packing box project, and plenty of other items on the project list. One thing I do need at the moment (preferably before I start some of the aforementioned projects), is a traditional sawbench.
A sawbench is one of those old workshop apparatuses that has been almost lost over time due to the adaption of power tools. It’s main purpose is to support yourself and your work piece while using a full size handsaw. The normal work bench height does not lend itself well to handsaw use because of the recommended 45-60 degree working angle of the saw. You end up either holding the saw above your head or crouching down to work upwards, both of which are a pain. The sawbench lowers the work piece so you can use a natural “rowing” motion, similar to pull starting a lawn mower. At the correct height, the sawbench also lets you use your body as a clamp to hold the piece.
There are a myriad of different designs for a sawbench. Up to this point I’ve been using two 5 gallon buckets with a piece of wood in between. This has been working OK, but takes up a lot of space, doesn’t look very nice, and I need to use the wood eventually, so it’s time to make something a little more permanent.
I often break down 8′ pieces of lumber, so I decided to make two sawbenches in order to support longer boards. Also, because I have limited space to store these sawbenches, I decided to make them stackable. Making two also allowed me to choose two different designs. I was having trouble narrowing it down to one final design!
About a week ago I listened to a Woodtalk episode where they talk about shop furniture and how they approach it. The approaches varied between strictly utilitarian up to “nice enough to be used as furniture in your home.” I think I have one of each with the two designs I picked for the stackable sawbenches. The image below is a quick blender render of the two designs I chose.
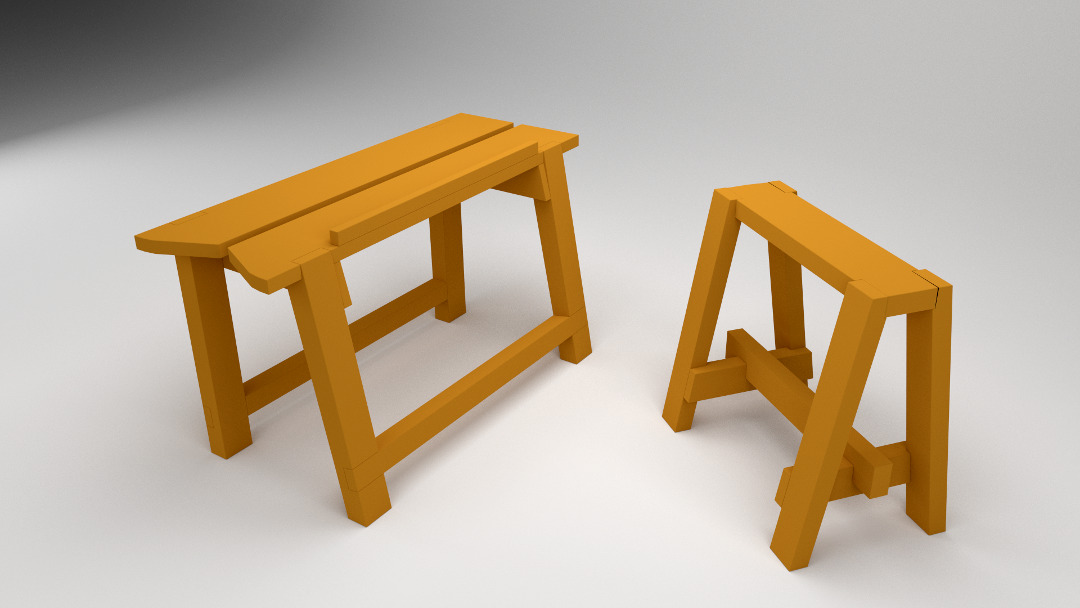
sawbenches
The first design I chose fits into the strictly utilitarian category. This is going to be the narrower of the two and is based on Chris Schwarz’s $5.87 Sawbench. It is the one on the right in the render above and will be made out of one 2×8. I modified the design and dimensions just a tad in order to fit under the second design I chose.
The sawbench on the left in the image above is based on Tom Fidgen’s Sawyer’s Bench from his Unplugged Woodshop book. This is a more complicated design, with the split-top, ripping notch, and removable stop. This will probably end up being the bench I use the majority of the time because of all it’s extra features.
Here is how they should stack:
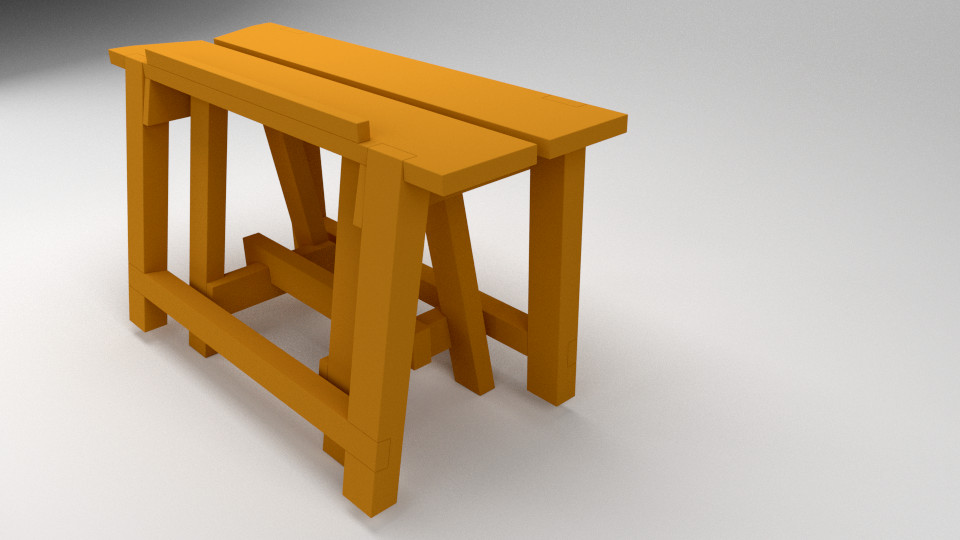
Stackable Sawbenches
In order to support the work piece correctly the two benches will be at the same height, so the one on top will be floating when stacked. This shouldn’t be much of a problem, because the one on the bottom should be wide and long enough to support the top one without any problems. It remains to be seen exactly how well this will work, but I’m hoping for the best!
I’ll be making the smaller of the two first, so stay tuned for sawbench number 1 soon. As always, both will be made entirely with hand tools. To cut down on the cost and weight, I’ll be using standard dimensional douglas fir for both of them.
I’m looking forward to getting some more use out of the freshly sharpened saw!


[…] smaller of the two sawbenches went together pretty quickly over the course of a few days. I pretty much followed Chris […]
[…] I mentioned in the Design phase, the second and larger of the two sawbenches is based on the sawyer’s bench in Tom […]